IN THIS ARTICLE
Asset Processor Interface
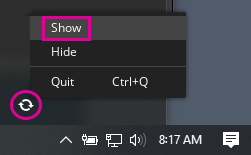
Asset Processor launches with Open 3D Engine (O3DE) and runs as a background process. It monitors scan directories and creates and manages the job queue for asset processing jobs. With Asset Processor, you can see the results of asset processing jobs and troubleshoot asset processing issues. To view the Asset Processor interface, right-click the Asset Processor icon in the system tray and select Show.
Asset Processor interface
The Asset Processor UI has several tabs you can use to view the status of asset processing jobs, and get details about specific jobs and assets.

- A: The status line in the upper left displays information about process activity, including the number of active jobs and remaining jobs.
- B: Performance metrics are displayed in the upper right including the time spent on the last scan, the time spent on the last analysis, and the time spent processing assets.
- C: Choose the
help icon to visit this documentation.
- D: The project, engine root, and the port used by Asset Processor to communicate with other processes are displayed below the status line.
- E: The buttons on the left select the tab to display in the Asset Processor UI. Refer to Asset Processor tabs below for more information.
- F: The information Asset Processor displays is dependent on the selected Asset Processor tab. Refer to Asset Processor tabs below for more information.
Asset Processor tabs
The buttons on the left of the Asset Processor Interface (labeled E in the Asset Processor UI image above) select which tab to display (labeled F in the Asset Processor UI image above).
Jobs
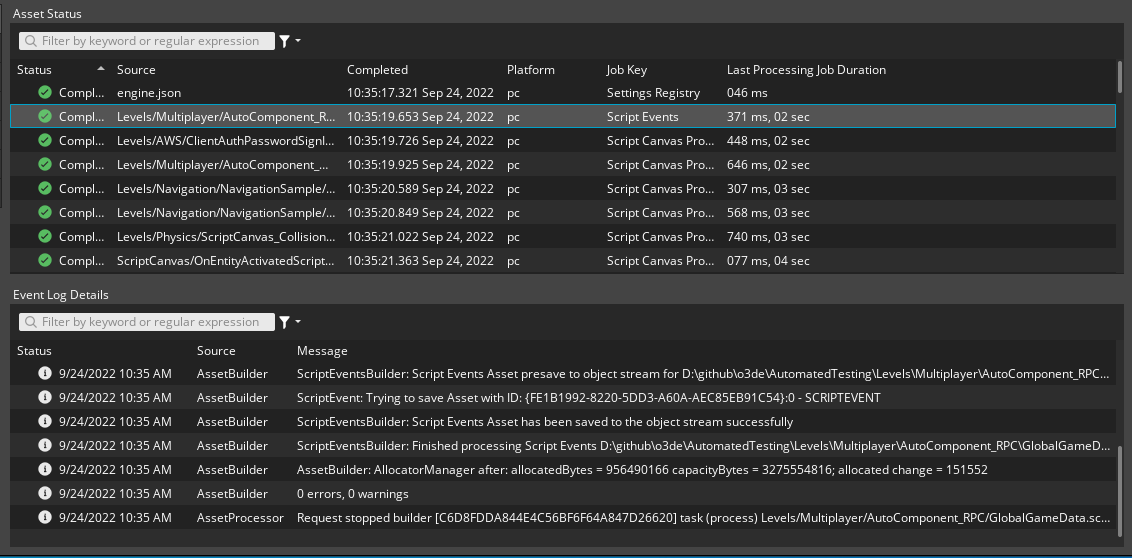
In the Jobs tab, the Asset Status pane displays the complete list of asset process jobs, the status of the jobs, and job details including completion time, deployment platform, job key (the descriptive name of the job), and last processing job duration. The Event Log Details pane displays the event log details for the asset selected in the Asset Status pane.
Jobs for critical assets are processed before non-critical assets. Critical assets are required so that the engine can function and are marked as critical by their Asset Builders.
Asset processor supports job escalation for assets that are referenced before they have been processed. When you first launch O3DE Editor, it waits until all critical assets have processed, then O3DE Editor opens. Asset Processor continues processing non-critical assets in the background. If your interactions with O3DE Editor reference an asset that has not been processed, the job for the referenced asset is escalated so that the asset can be processed and loaded quickly.
The Asset Status list can be sorted by status, source asset path, completion time, deployment platform, job key, or the processing time. Right-click any list item to access the source or the product asset, or view the logs for the process job.
Status Column
Jobs in the Asset Status list display the statuses below:
Pending - The job has been created, but has not run.
Processing - The job is in progress.
Completed - Warning - The job has completed but has emitted a warning.
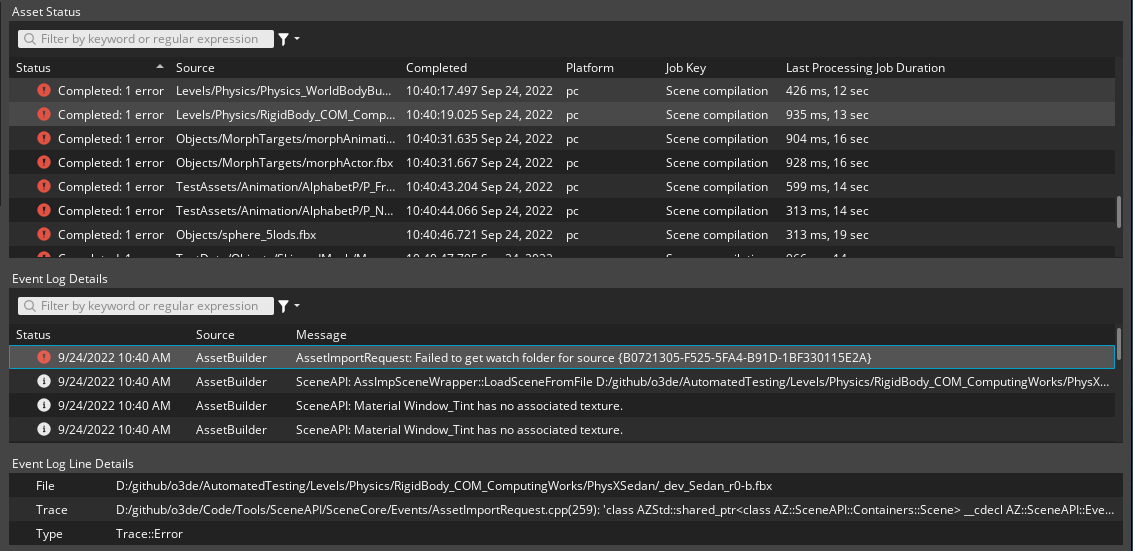
Completed - Error - The job has completed and has emitted an error.
Completed - The job has completed successfully with no warnings, errors, or failures.
Failed - The job has failed and has emitted a failure.
It’s possible for a job to emit a combination of warnings, errors, and failures.
Completed with warnings produces a valid product asset, but might have some data substituted. Suppose a job is processing a .fbx file that produces several mesh product assets, and that a .assetinfo sidecar file specifies to process the meshes with custom normals. If the meshes in the .fbx file do not have custom normals, the Asset Builder generates normals instead. Valid product assets are produced, but several warnings are emitted because custom normals could not be found for the mesh assets.
Completed with errors produces a product asset but it may not be valid for all use cases, such as having incomplete data. Errors happen when data required for the product asset is missing or cannot be produced. Using the example above, suppose the .assetinfo specifies tangents should be generated for the mesh product assets, but the Asset Builder fails to produce the tangents. The end result is a valid product asset that does not contain all the requested data.
Failed jobs do not produce a product asset.
What is considered a log message, warning, error, and failure, and how the system handles these is up to each builder’s author. Our guidance is:
- Print a log message for anything that will be useful as a bread crumb for tracking down problems later, for both the content creator or the builder author.
- Emit a warning if something is wrong but it can mostly be handled, and the output your builder can generate is reasonably close to what the content creator intended.
- Post an error if your builder encounters data it can’t properly handle and you know the product asset you output won’t be fully correct. When possible, this is preferred over a failure because the failure won’t produce any product asset, so any references from other assets to this asset may break. For example, if a prefab references a mesh product asset from an FBX file, an update to the FBX causes the job to fail, then any edits to the prefab while this job is failing may lose the reference to the mesh.
- Post a failure if your builder encounters something it cannot handle and processing should end for that builder, and the builder should not output anything. This is generally considered a last resort, and is most commonly seen when a builder crashes during processing.
Note:The most common reason for failure is that the Asset Builder has crashed. When an Asset Builder crashes, Asset Processor logs the job as failed and continues processing assets from the jobs list. When Asset Processor is restarted, it attempts to reprocess any failed jobs. If an asset has failed to process, we recommend you first examine why this failure occurred, and inform your team, sharing any relevant artifacts such as log messages. Once you proceed to the next step, that information may be lost. Alternatively, you can locate individual source assets in the Assets tab, right-click on the asset, and select Reprocess File to re-run the process job.
The circumstances that cause an Asset Builder to complete a job with warnings, errors, or failures are left to the implementation of the Asset Builder, but should follow the guidance above.
Filtering by keyword and status
The Asset Status list can be filtered by entering keywords and regular expressions in the filter box. The regular expressions (regex) are standard std::regex in extended format. The std::regex rules apply.
The example below searches for all files ending with .png. The period is escaped, because in a regex search . matches any non-newline character. The $ indicates the match should be at the end of the string, so this won’t match a file with multiple extensions that has .png in the middle, myImage.png.assetinfo wouldn’t be matched, for example.
\.png$
Note:It’s easy to forget this is a regex based search. Searching for “.fbx” does not actually search for that exact string, it means search for any character followed by the characters fbx. “.FBX” would return results such as “MyFBXTexture.png”, because it matches the given search condition, the ‘.’ matches any character, including ‘y’ in this example.
The example below uses regex to search for any files under an Actors subdirectory. The dot plus (.+) indicates any character 1 or more times.
/Actors/.+
You can view all assets with a particular status with either of the methods below.
Type the status keyword (for example,
failed) in the filter box.Choose the
filter icon and select the status types to display.
Filters that you apply remain active until you remove them.
Row context menu
You can perform actions on each row in the Asset Status table. Right-click on the row to expose a context menu with the following actions:
| Menu Item | Description |
|---|---|
| Show in Asset Browser | Highlights the asset in O3DE Editor’s Asset Browser, if O3DE Editor is open. |
| View Source Asset | Switches to the Asset Tab, and selects the Source Asset for this job. |
| View Product Asset… | A pop out menu showing all product assets created from this job. Selecting one will switch to the Asset Tab and select that Product Asset. |
| Open in Explorer | Opens the asset in the system file browser. |
| Open | Attempts to open the Source Asset with your operating system’s default interface for opening files of that type. |
| Copy | Copies the asset name. |
| Open log file | Opens the most recent log file for the asset, if one exists. |
| Open folder with log file | Opens the directory containing the log file for the asset. |
Event Log Details
The Event Log Details table displays asset processing information for the asset selected in the Asset Status table. This table provides an activity log that shows how the asset was processed and any errors or warnings generated during processing.
The Status column displays icons for the following message types:
Information - Additional supporting messages are available about the processing of the asset.
Warning - Additional supporting messages are available about a potential processing issue for this asset.
Error - The location of the asset and the specific error generated by attempting to process that asset.
The Source column indicates the subsystem that generated the message (such as Asset Builder) or a generic type, such as Warning or Error.
The Message column displays information related to the processing details of the selected asset.
Note:The Message column occasionally prefixes Errors with E: and warnings with W:.
The Event Log Details table also features a context menu to copy details to the clipboard. Right-click on the row to expose a context menu with the following actions:
| Menu Item | Description |
|---|---|
| Copy Line | Copy the selected line of the log. |
| Copy Line With Details | Copy the selected line and any related details that appear in the Event Log Line Details table. |
| Copy All | Copy all log lines and any hidden details for each item. |
If the selected line in the Event Log Details table has any additional information, the Event Log Line Details table will be displayed automatically. The details and additional information are generally useful only when debugging issues with a particular asset.
The Event Log Line Details table also features a context menu to copy details to the clipboard. Right-click on the row to expose a context menu with the following actions:
| Menu Item | Description |
|---|---|
| Copy Selected Key | Copy the text in the Key column of the selected row. |
| Copy Selected Value | Copy the text in the Value column of the selected row. |
| Copy All Values | Copy all keys and values in the table. |
Assets
In the Assets tab, the tabbed pane on the left displays either the Source Assets tree from the scan directories, the Intermediate Assets, or the Product Assets tree from the Asset Cache. You can browse either tree for specific assets, or use the search bar to find assets by name or ID. When an asset is selected, information about the asset is displayed on the right of the interface.
The Assets Tab search is also a regex based search, like for the jobs tab. Refer to the previous section filtering by keyword and status for more information.
Note:The directory tree displayed in the tab is from the Asset Database, not the files on disk. It only displays assets that have been processed. Files on disk that are ignored by Asset Processor do not appear in the directory tree.
You can browse source assets in the scan directories to view IDs and dependency information for each asset. You can also browse product assets in the Asset Cache and view IDs, last process time, job key, deployment platform, and dependency information for each asset. A search bar is available in both tabs to filter the list of assets that are displayed. Search matches partial file names, and regex is supported.
With an asset selected, you can right-click and select from several actions such as view the source asset, view the job, open the asset location in a file manager, copy the asset path, and reprocess the asset.
Source Assets
On the left, the Source Assets tree displays all the source assets that match the current search filter. When the search is empty, all source assets are displayed. The “Last Analysis Job Duration” column shows the accumulation of duration values of all builders’ CreateJobs on this source asset.
When an asset is selected in the Source Assets list, information about the asset is displayed in the header and tabs on the right.
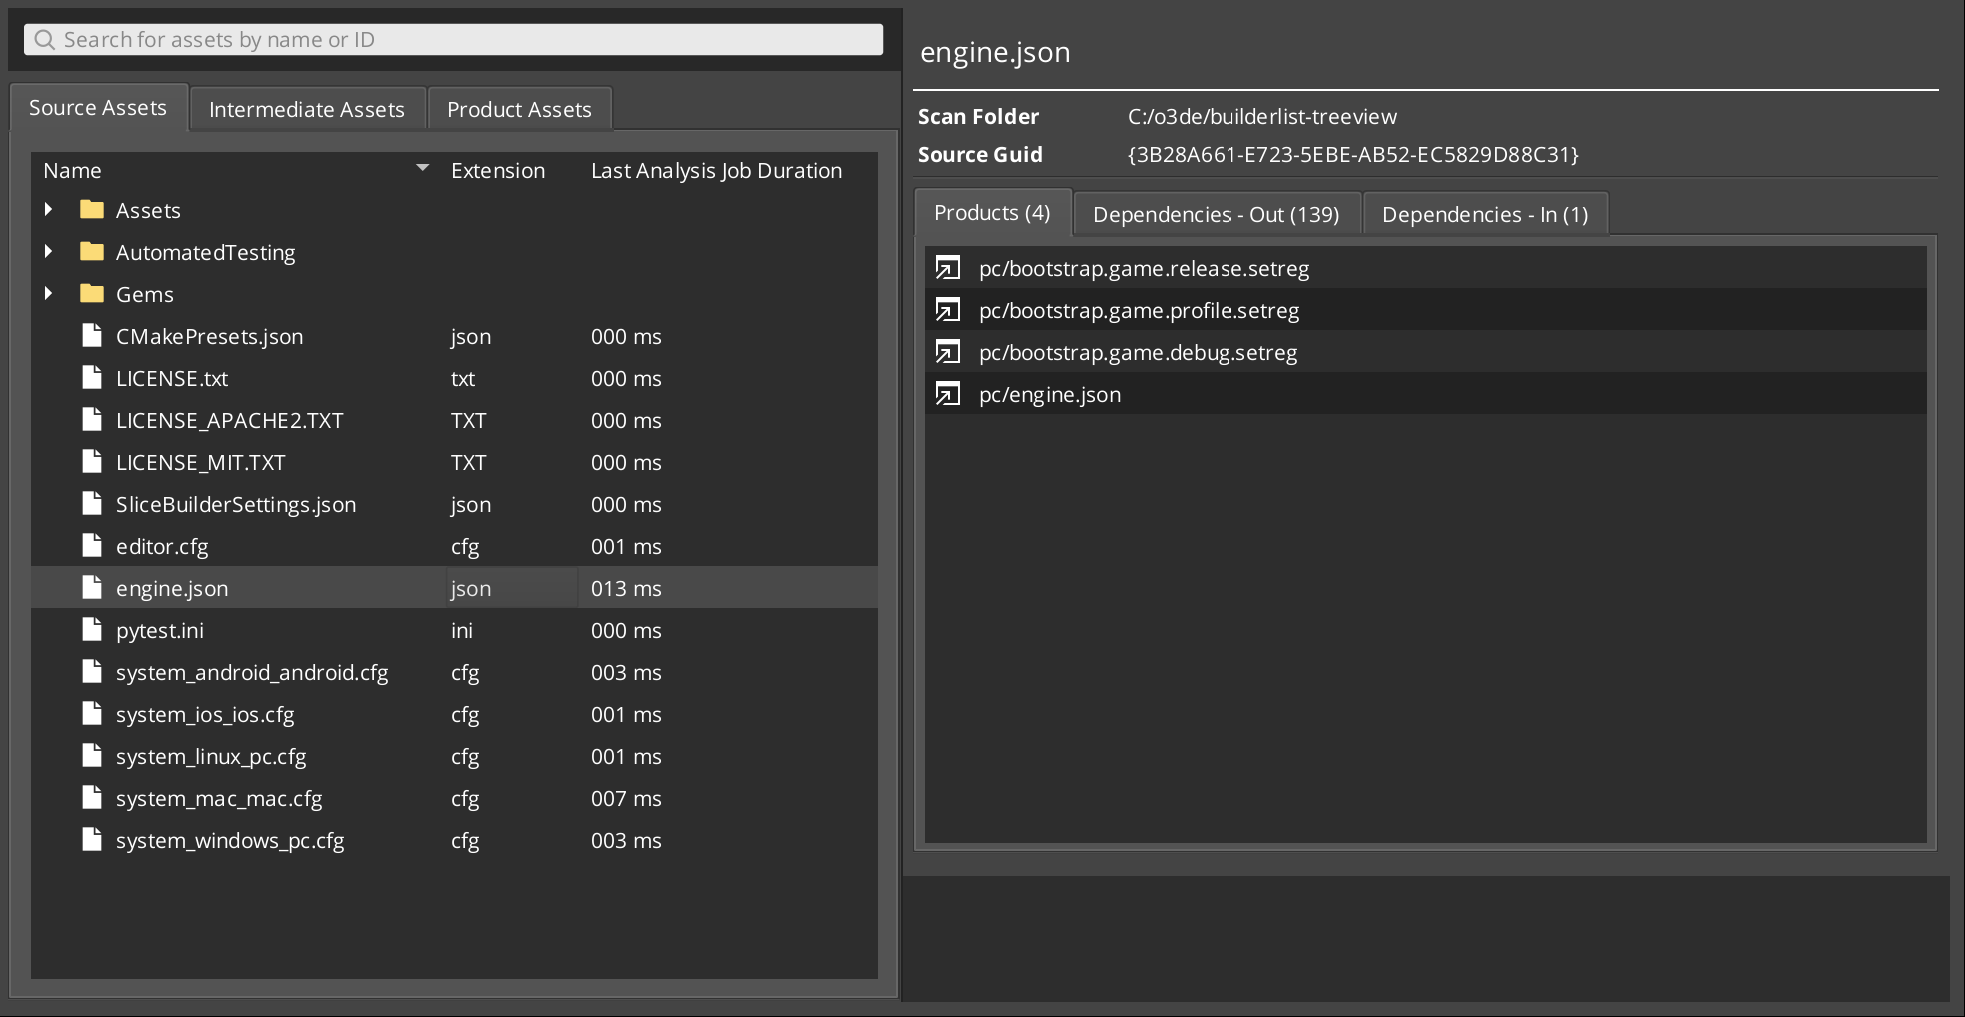
| Pane | Description |
|---|---|
| Asset Information | Detailed information about the selected asset including the name of the asset, the scan directory path, and the Universally Unique Identifier (UUID) associated with the asset. |
| Products | The product assets that are produced from jobs that processed this source asset. |
| Dependencies - Out | Any files that have been registered as a source dependency for any jobs that run on this source asset. |
| Dependencies - In | The list of source assets that have one or more jobs that have marked this source asset as a source dependency. Any modifications to this source asset will cause these jobs to run. |
Note:Choose theGo to icon next to a product asset name to go to that asset in the Product Assets tab, or this icon next to a source asset name to go to that asset in the Source Assets tab.
Intermediate Assets
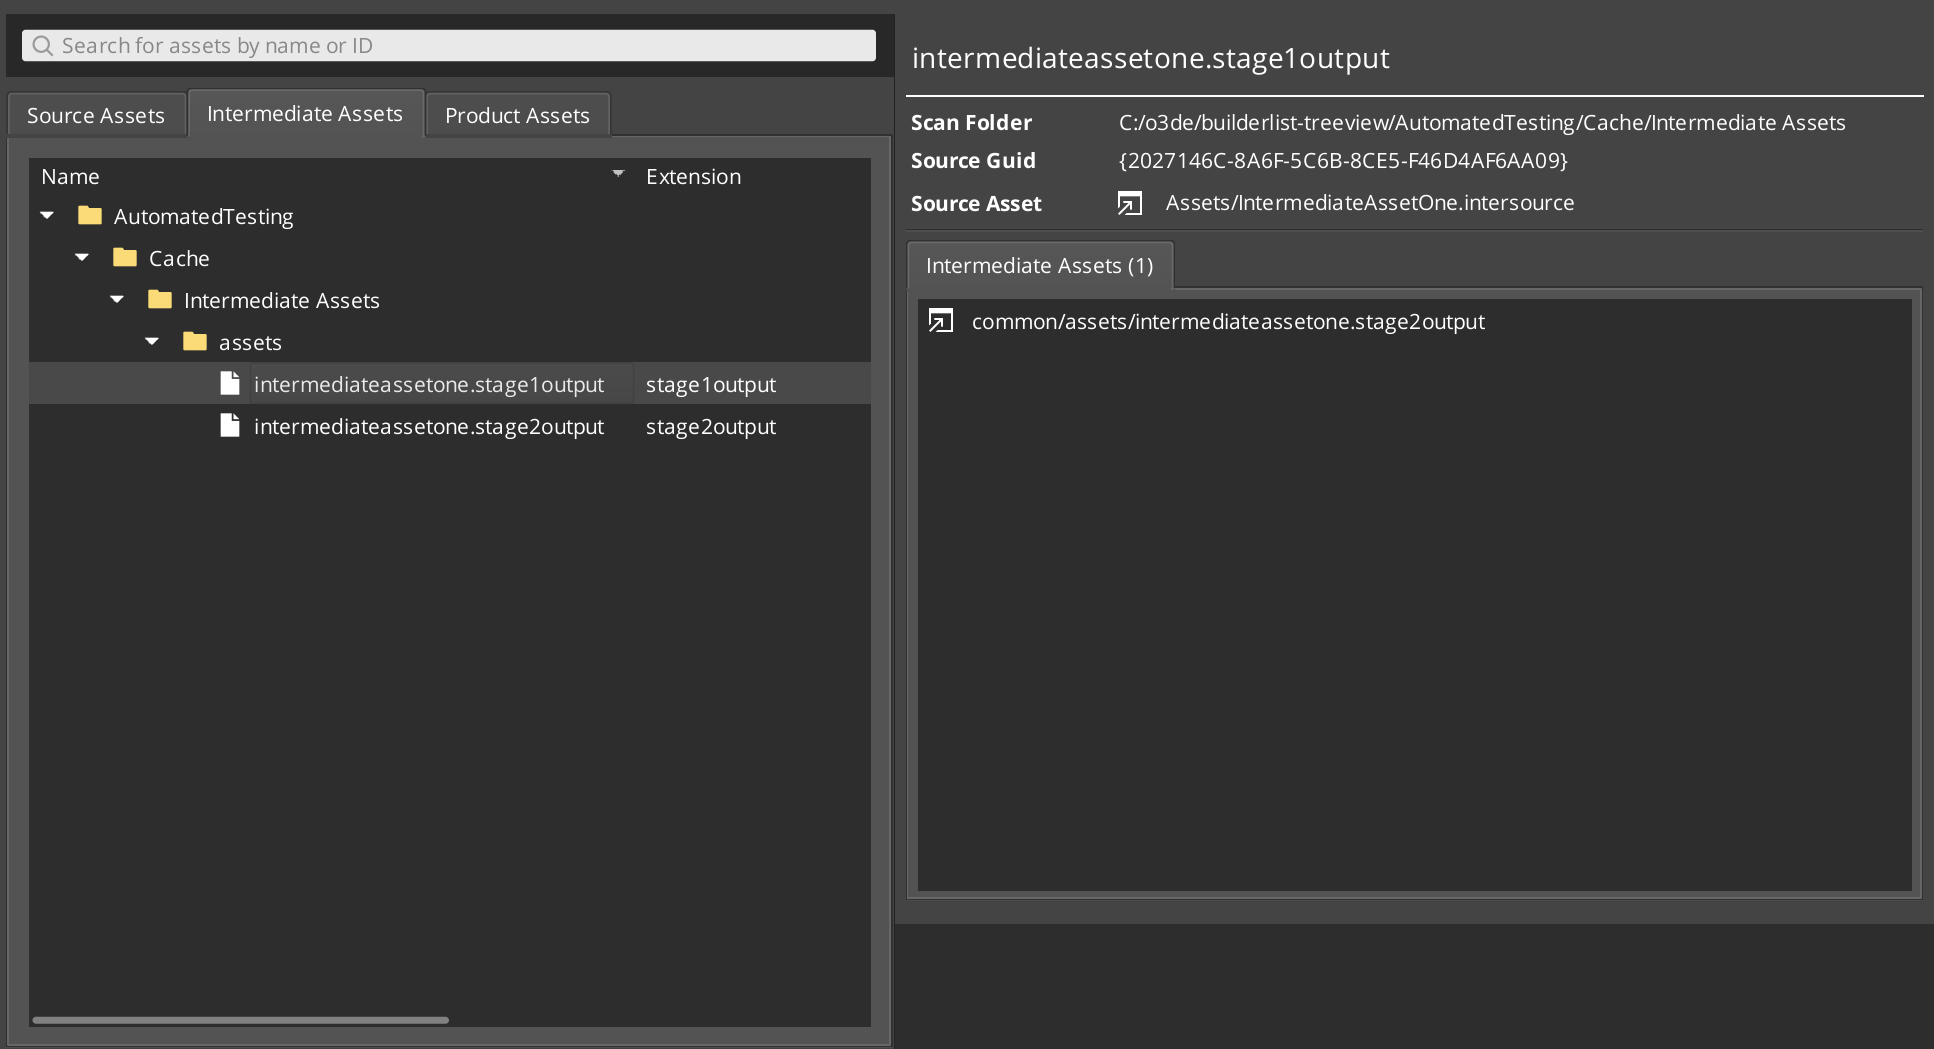
Intermediate Assets are product assets that are monitored by Asset Processor as Source Assets. It allows you to chain builders together and add discrete steps for asset processing. Similar to the source assets pane, the search and the Intermediate Assets tree is on the left. The right side of the pane shows details of the selected Intermediate Asset, including the outcome of the Intermediate Asset, which could be a Product Asset or another Intermediate Asset. You can retrieve more information from Intermediate Assets documentation.
Product Assets
On the left, the Product Assets tree displays all the product assets that match the current search filter. When the search is empty, all product assets are displayed.
When an asset is selected in the Product Assets tree, information about the asset is displayed in the panes on the right.
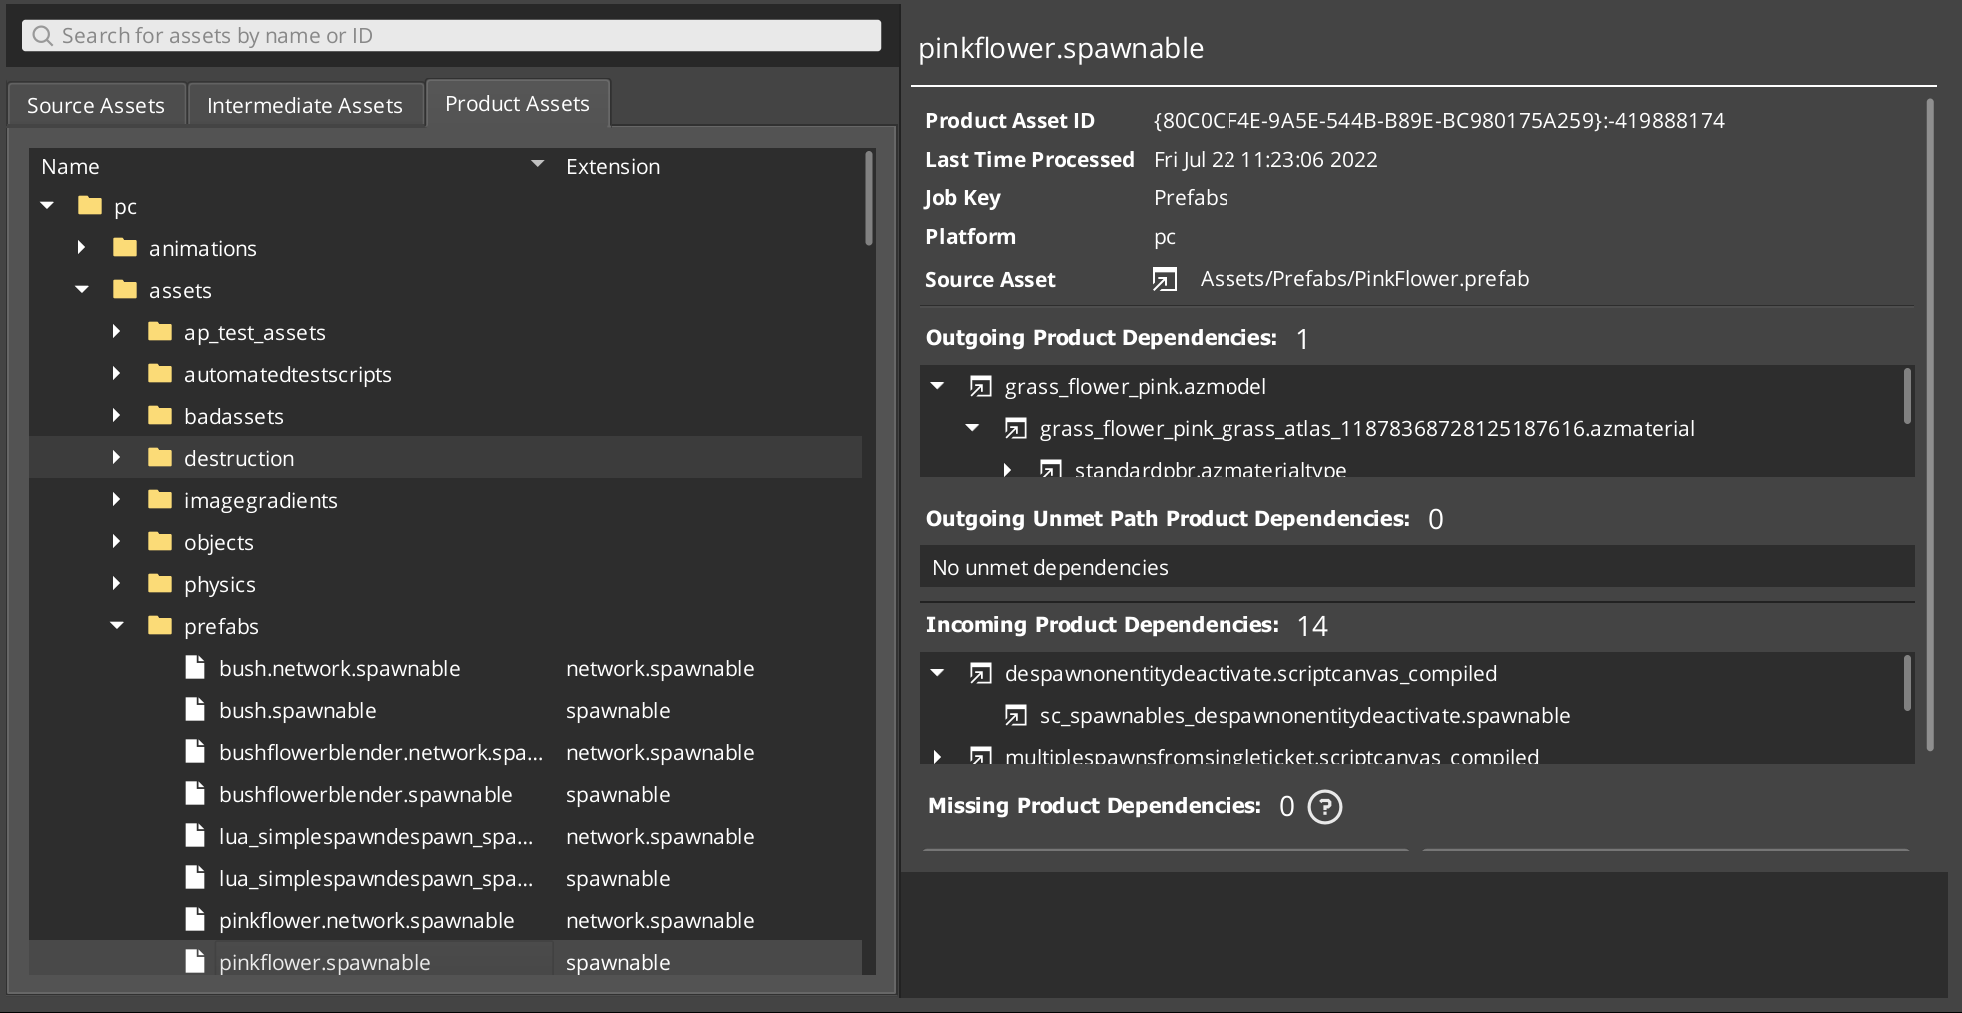
| Pane | Description |
|---|---|
| Asset Information | Information for the product asset including the asset ID, the last time the product was generated, the job that generated the asset (job key), which platform the asset was produced for, and which source asset is the primary input for the product. |
| Outgoing Product Dependencies | Product assets that this asset depends on are listed here (outgoing dependency). Items in this list can be expanded recursively to show the outgoing dependencies of those items. |
| Outgoing Unmet Path Product Dependencies | Path based product dependencies that have not been resolved. In some cases, these may be optional and expected. In other cases, an unmet path product dependency could indicate a gap in your product dependency graph. If you do not resolve this gap, the bundled release build might be missing content. |
| Incoming Product Dependencies | Product assets that depend on this asset are listed here (incoming dependency). Items in this list can be expanded recursively to show the incoming dependencies of those items. |
| Missing Product Dependencies | A tool that examines the contents of this product asset, looks for references to other product assets, and will report any references that look like product dependencies that are not reported. See Resolving Missing Assets for details. |
Logs
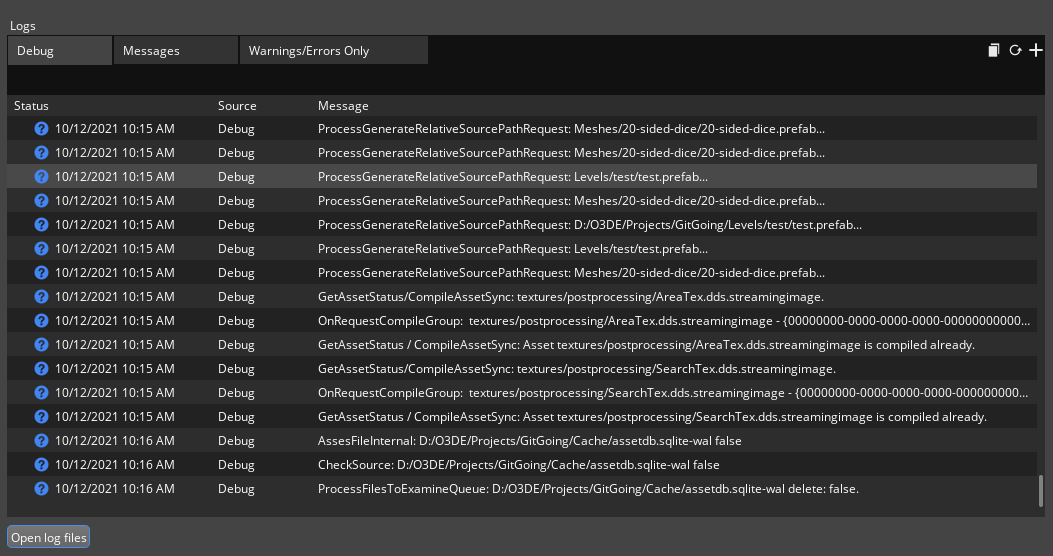
The Logs tab displays logs for Asset Processor itself, not for process jobs. If you are having issues with a specific process job, start debugging with the logs for the job found in the Jobs tab. The type of errors displayed in the Logs tab are often related issues with managing the process jobs, maintaining the Asset Cache, and writing log information for process jobs.
The Logs tab has a single pane with three default tabs that display Debug, Messages, or Warnings/Errors Only. You can also add custom tabs to display any combination of information.
Connections
In the Connections view, a single pane displays the current connections, and offers tools to add, remove, and manage connections. This view displays connections to Asset Builders, O3DE Editor, and development and deployment platforms being served by the Asset Processor. You can add approved connections in Allowed Listed Connections and add disapproved connections in Rejected Connections.
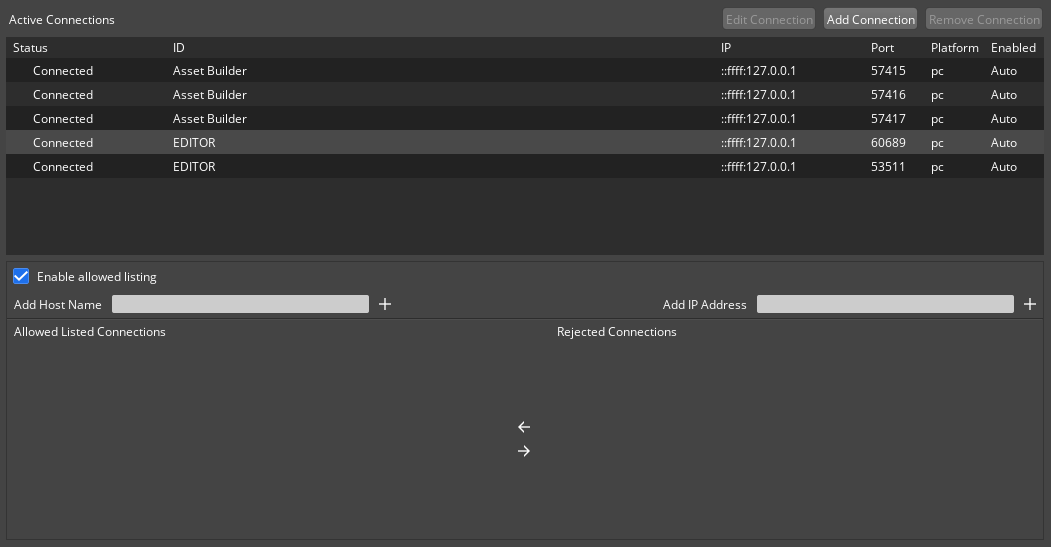
In the Active Connections table’s Enabled column, automatic connections are labeled as Auto. This means that it’s a connection that the Asset Processor created. One example of such a connection is Asset Builder connections. User-created connections show a check box. If you select the check box, the Asset Processor continually attempts to reconnect to those connections. You can use these custom connections for specialized cases, such as when connecting to mobile devices outside of a company’s internal network.
Editing connections
You can edit a connection with the steps below.
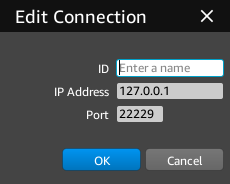
- Left-click the desired connection in the connection list to select it.
- Choose Edit Connection in the upper-right to open the Edit Connection dialog.
Builders
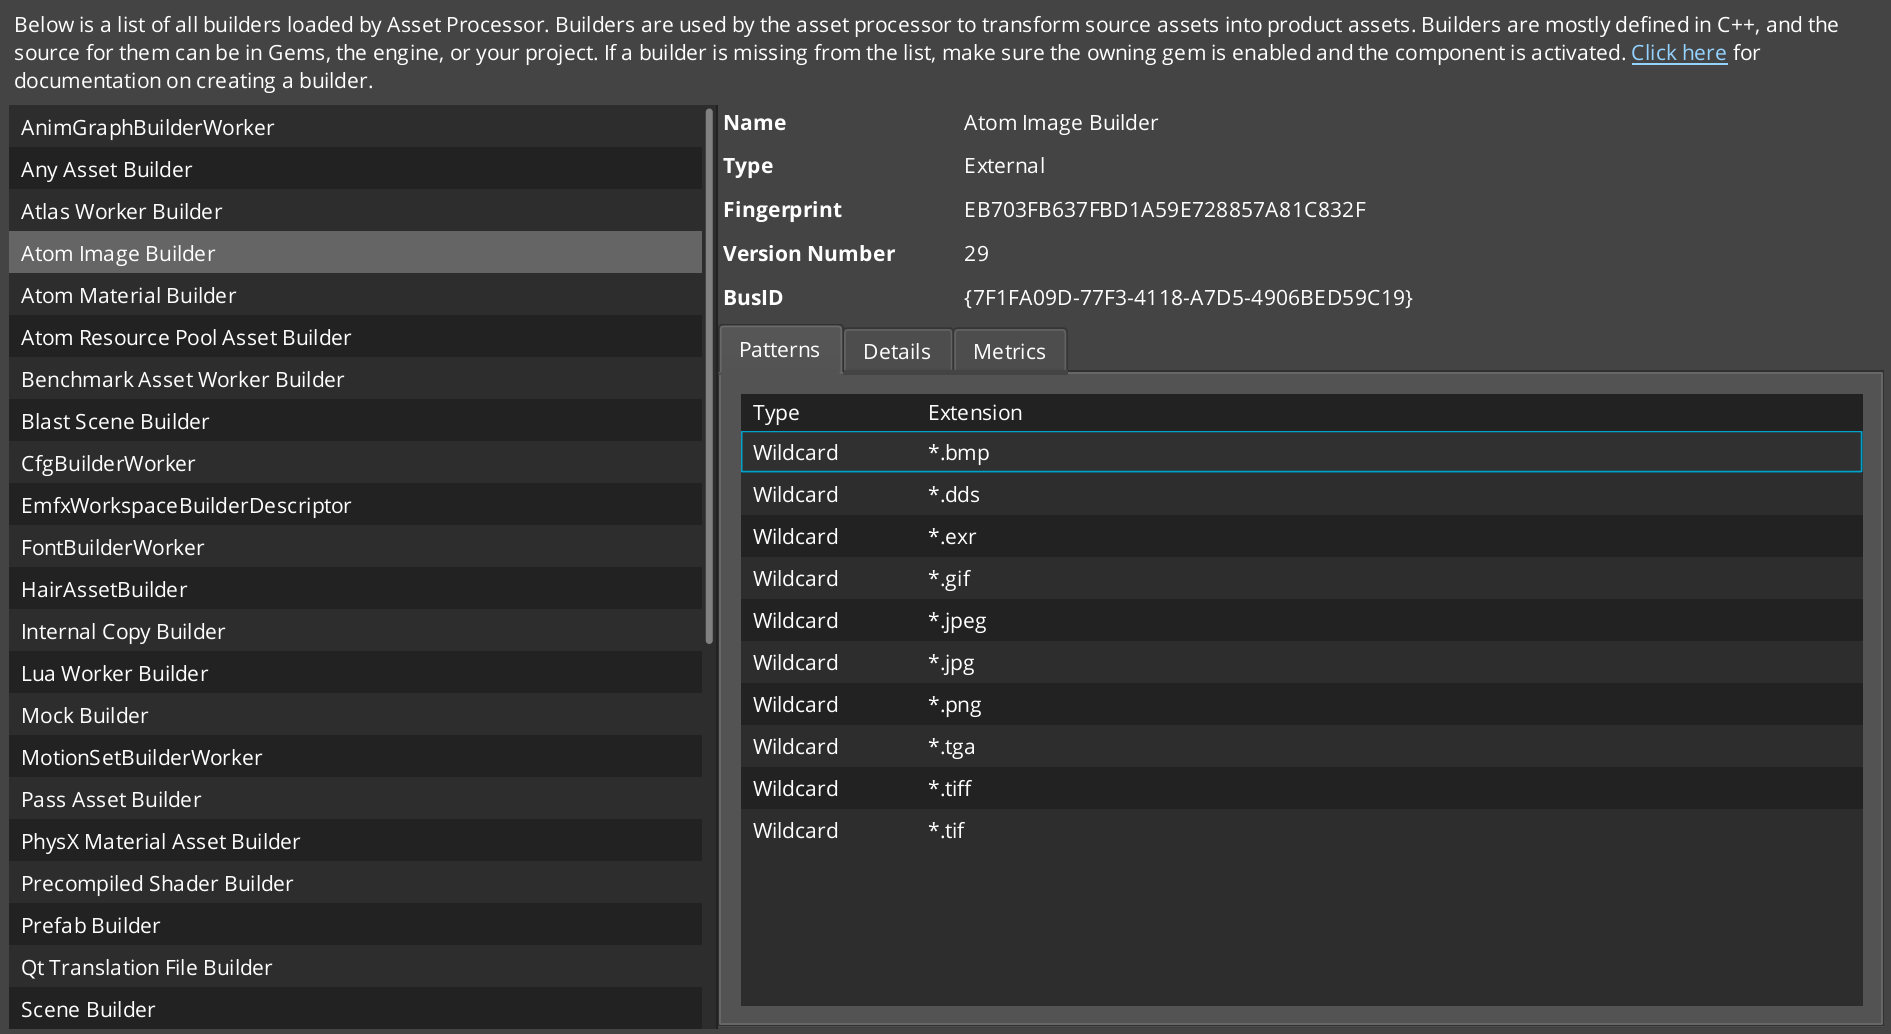
In the Builders view, the left pane lists all registered builders recognized by the Asset Processor. You can click on the builder in the list to retrieve the builder’s information on the right pane.
The right pane shows the type, fingerprint, version number, Universally Unique Identifier (UUID) of the builder in the header. The bottom of the right pane consists three stacked tabs showing patterns, details, and metrics of the builder respectively.
| Item Name | Description |
|---|---|
| Header | The Asset Builder’s type, (analysis) fingerprint, version, Bus ID (builder UUID) is shown in this section. Builder Type can be either Internal or External. Internal builders are created and run inside Asset Processor, while external builders are located within Gems and are run inside an AssetBuilder application. |
| Patterns | All the file patterns that this builder wants to work on. Patterns can be defined by regular expressions (RegEx) or wildcards. If a file matches a pattern of the builder, it will become a source asset tracked by Asset Processor. When a source asset changes, Asset Processor will call the builder’s CreateJobs function with this asset as an argument. |
| Details | This tab is currently empty and is reserved to show detailed information about this builder in the future. |
| Metrics | This tab shows the accumulation duration that the builder takes to process all source assets it wants to work on. You can expand the tree to see the composition of the duration. The tabular tree is sortable by name, job count, total duration, or average duration. |
Tools
In the Tools view, you can activate Faster Scanning Mode, enable Debug Output, and initiate a full scan of available source assets.

Faster Scanning Mode detects source asset file changes using the timestamp of the file, and performs a series of quick checks to determine whether to process a source asset. When Fast Scanning Mode is disabled, file hashes are used to detect changes, which increases source asset analysis time.
When Debug Output is enabled, builders that support it will output debug information as product assets.
Initiating a full scan checks all of the scan directories and processes any source assets that need to be processed. You can initiate a full scan to attempt to reprocess jobs that might have failed due to an Asset Builder crash.
Shared Cache
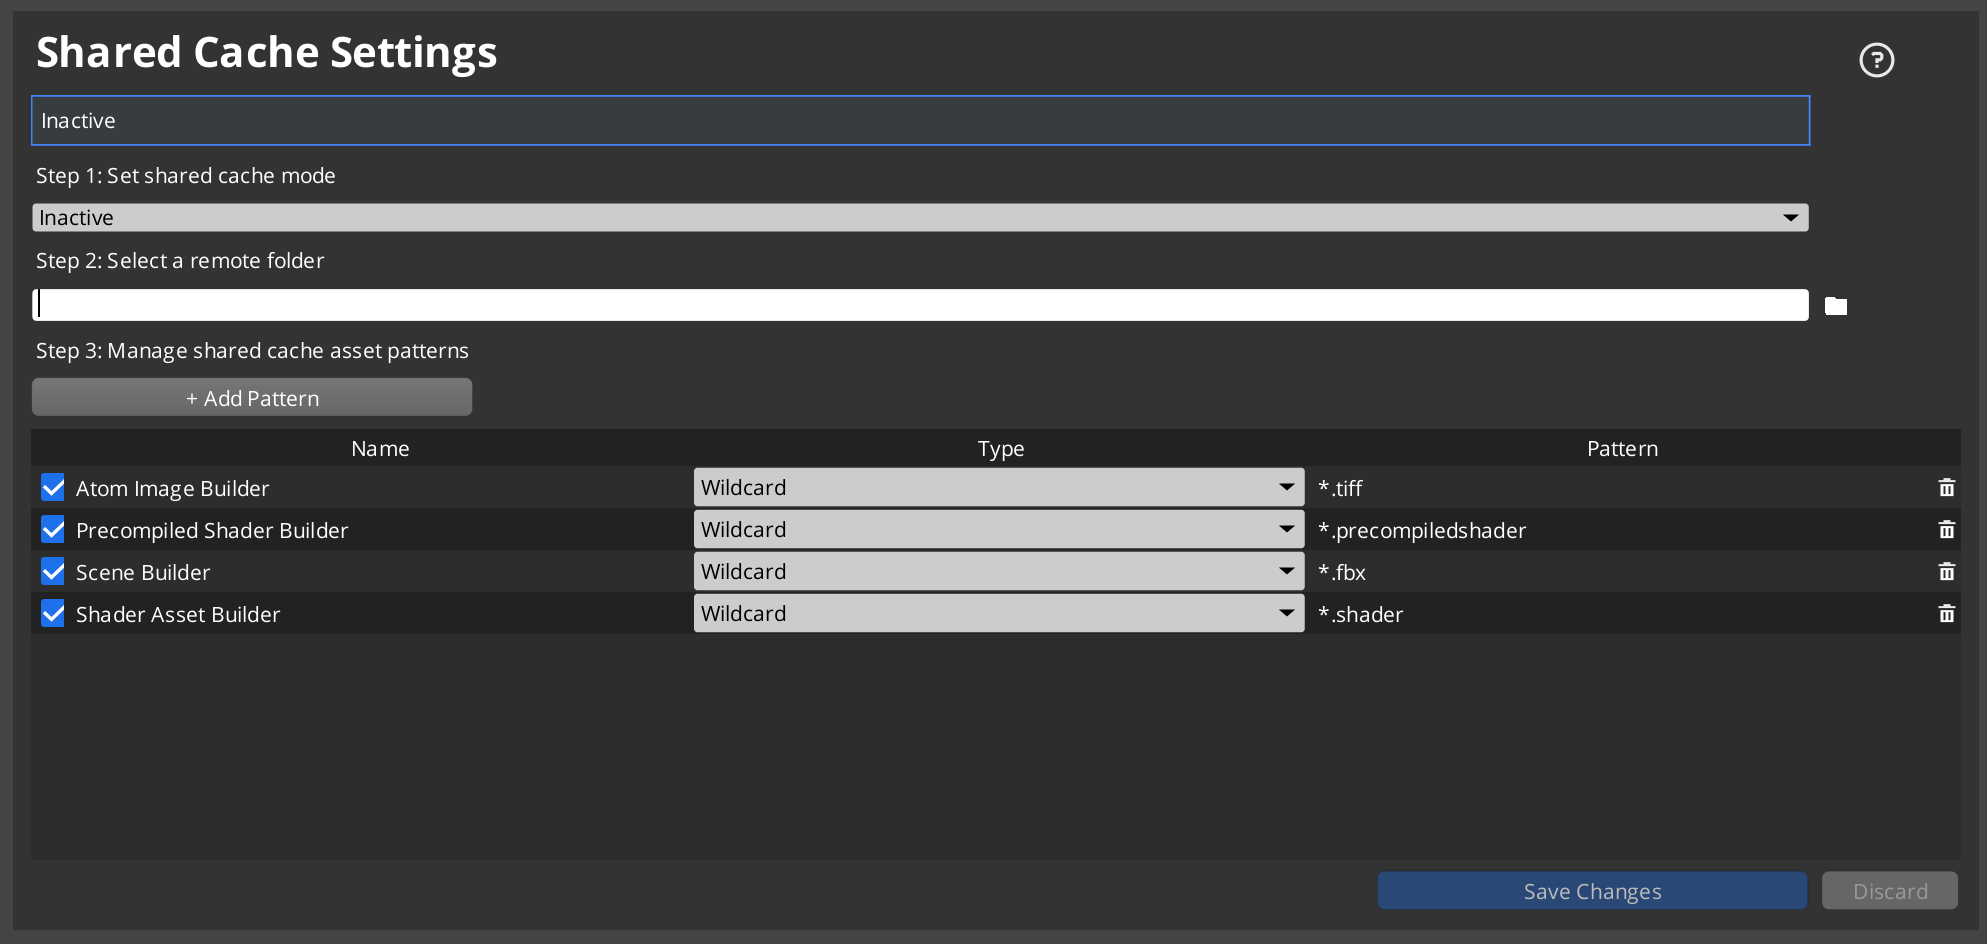
You can configure Asset Cache Server (ACS) settings in Shared Cache view. Asset Cache Server is a way to share cached Product Assets across the team. When Asset Cache Server is enabled, Asset Processor can retrieve preprocessed Product Assets from an asset cache server, saving its processing time. You can set the Asset Cache Server mode, select the remote folder, and manage asset patterns in this view.
For more information about the Asset Cache Server mode, refer to
Asset Cache Server documentation.
