IN THIS ARTICLE
Finding Paths using Recast Navigation Gem in Open 3D Engine
You can create a navigation mesh by using Recast Navigation Mesh component and its dependencies, and then use Detour Navigation component to find a path between two entities or two points within the navigation area.
Creating a navigation mesh
In O3DE Editor, create an entity.
Select the entity in the viewport or Entity Outliner.
In Entity Inspector, click Add Component, and then add a Recast Navigation Mesh component.
In Entity Inspector, find the Recast Navigation Mesh component, and then click Add Required Component.
Select Recast Navigation PhysX Provider component.
In Entity Inspector, find the Recast Navigation PhysX Provider component, and then click Add Required Component.
Select Axis Aligned Box Shape component.
Modify Axis Aligned Box Shape to extend over the area you wish to navigate.
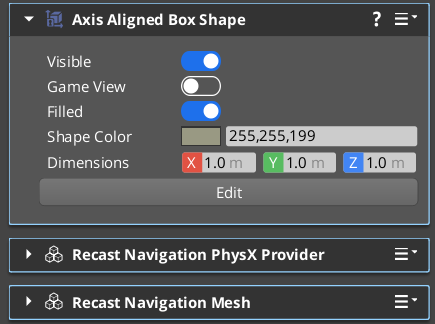
These three components together form and describe a navigation mesh. Axis Aligned Box Shape component defines the area that will a navigation mesh covers. Recast Navigation PhysX Provider component collects the geometry data of any PhysX colliders within the area. Recast Navigation Mesh component computes the navigation mesh from the geometry data.
Visualizing the Navigation Mesh
Visualize the navigation area to confirm that the navigation mesh has been configured correctly. Here is an example from AutomatedTesting project’s Navigation Sample level with visualization turned off.
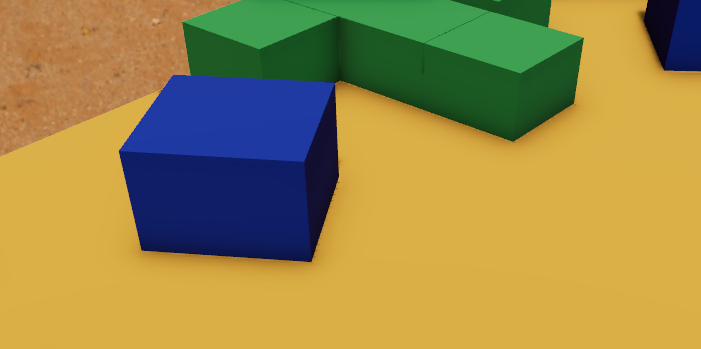
Enable visualization with the following steps.
In O3DE Editor, select the entity in the viewport or Entity Outliner with a Recast Navigation Mesh component.
In Entity Inspector, find the Recast Navigation Mesh component, and then enable Debug Draw property.
Alternatively, enable visualization for all navigation meshes using CVar
cl_navmesh_debug.Enter the game mode with CTRL+G or using the main menu with Game -> Play Game.
Observe the visualization of the navigation mesh.
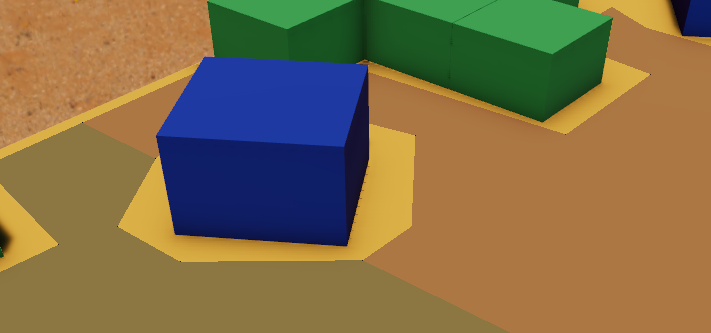 Note:In this example, you can see different colored planes layered on top of the physical colliders in the level. Different colors represent different portions of the navigation mesh that are stitched together to form a larger area. These portions are called navigation tiles. You can configure the size of these tiles using Tile Size property of a Recast Navigation Mesh component. Each navigation tile will be computed and processed separately, thus enabling faster updates.Important:A Recast Navigation Mesh component does not compute the navigation area until told so using C++ and scripting API. See the next section for details.
Compute or Update Navigation Mesh
On activation, a Recast Navigation Mesh component prepares itself for navigation mesh computation but it is up to you to invoke an update using C++ or scripting API.
Here are the steps to update a navigation mesh from C++.
Add
Gems::RecastNavigation.APItarget to the code where you will invoke an update.Using RecastNavigation::RecastNavigationMeshRequestBus, call
UpdateNavigationMeshBlockUntilCompletedfor a blocking way to update the navigation mesh.
// From Gems\RecastNavigation\Code\Include\RecastNavigation\RecastNavigationMeshBus.h
RecastNavigation::RecastNavigationMeshRequestBus::Event(navMeshEntityId,
    &RecastNavigation::RecastNavigationMeshRequestBus::Events::UpdateNavigationMeshBlockUntilCompleted);
- Use
UpdateNavigationMeshAsyncto asynchronously update the navigation mesh. The update completion will be notified usingRecastNavigationMeshNotificationBusnotification EBus.
Here are the steps to update a navigation mesh from Script Canvas.
Create a new Script Canvas.
Search for Recast nodes.
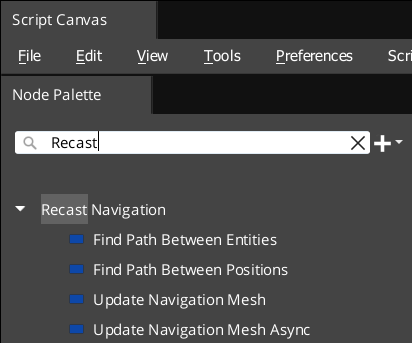
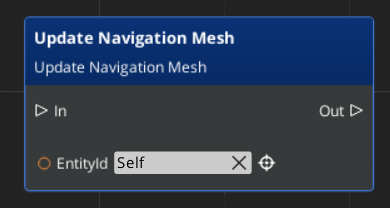
Update Navigation Mesh is a blocking update. EntityId must specify an entity with a Recast Navigation Mesh component.
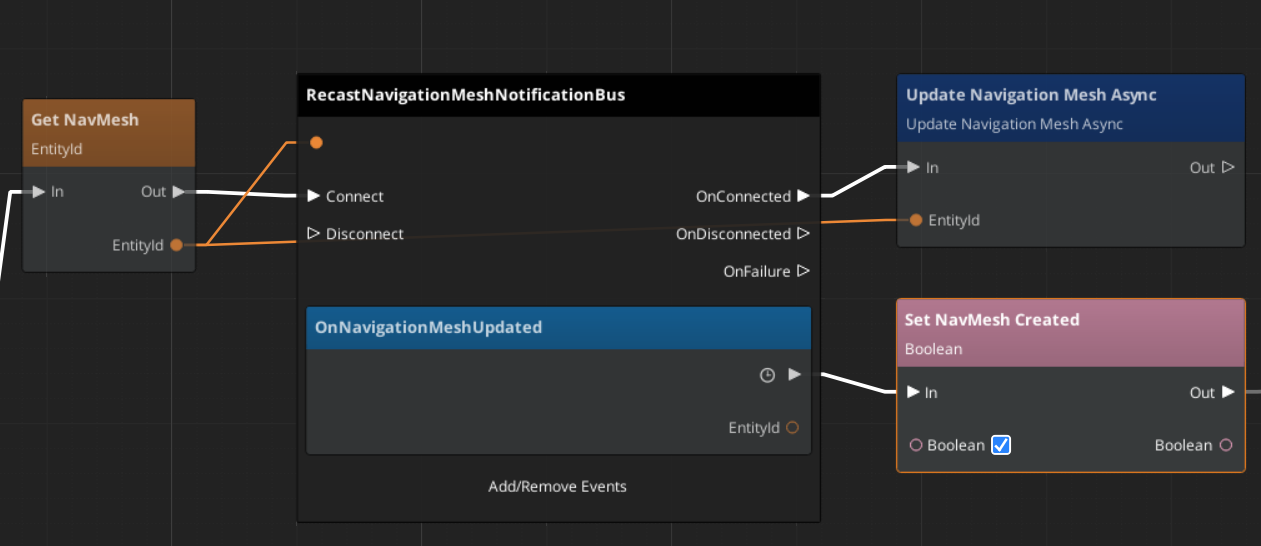
Update Navigation Mesh Async is an asynchronous operation. You should connect to RecastNavigationMeshNotificationBus to receive an update notification. Here is an example from Automated Testing project’s Navigation Sample level.
Finding Paths
Find paths between entities or positions within a given navigation mesh by using a Detour Navigation component.
In O3DE Editor, create an entity.
Select the entity in the viewport or Entity Outliner.
In Entity Inspector, click Add Component, and then add a Detour Navigation component.
In Entity Inspector, find the Detour Navigation component, and then set Navigation Mesh to point to the entity with the Recast Navigation Mesh component that you want to use for navigation.
 Note:There can be many Detour Navigation components for each Recast Navigation Mesh component. One approach can be to keep the Recast Navigation Mesh on the level, while adding separate Detour Navigation to each entity that you wish to navigate. Another design idea is to build an intermediate component that acts as a throughput balancer to limit how often you call into Detour Navigation components if you find that it is becoming your performance bottleneck.
The Detour Navigation component provides C++ interface to find a path.
// From Gems\RecastNavigation\Code\Include\RecastNavigation\DetourNavigationBus.h
RecastNavigation::DetourNavigationRequestBus::EventResult(waypoints, detourEntityId,
    &RecastNavigation::DetourNavigationRequestBus::Events::FindPathBetweenEntities, entity1, entity2);
// Or
RecastNavigation::DetourNavigationRequestBus::EventResult(waypoints, detourEntityId,
    &RecastNavigation::DetourNavigationRequestBus::Events::FindPathBetweenPositions, position1, position2);
The Detour Navigation component provides scripting interface to find a path.
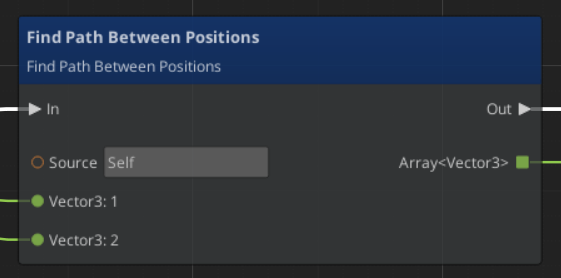
Note:See Automated Testing project’s Navigation Sample level for an example of using these components and APIs.
Configuring a Navigation Mesh
A single navigation mesh defines a navigation mesh for a specific actor type. You will need to create multiple Recast Navigation Mesh components (on separate entities), one for each actor type.
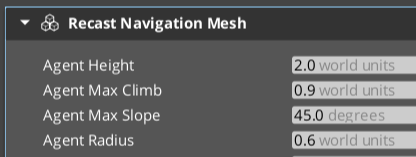
Here are the important actor parameters:
Agent Height and Agent Radius define the agent’s shape.
Agent Max Slope and Agent Max Climb define the ability of an agent of this type to climb within the navigation area.
