Using the Curve Editor in the UI Animation Editor.
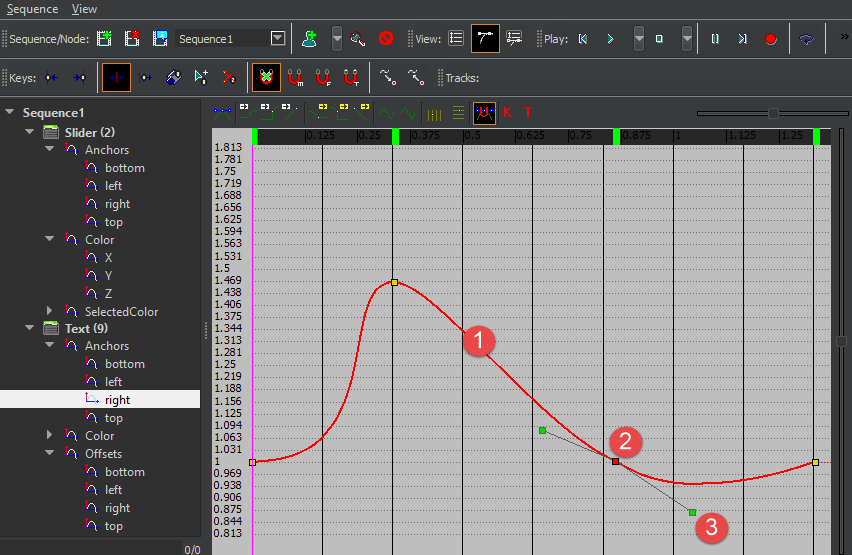
The Curve Editor displays animations as function curves. Each track’s curves represent an animation of a property value (such as anchor, offset, color, or any property of a UI element).
The elements of a curve
Curve or spline
Spline key
Tangent handles

The path of the curve represents the transition of the value between the keyframes. If the value changes in a straight line between each keyframe (linear), transitions between keyframes will not be smooth. The default curve causes the value to smoothly ease in and ease out. Each key has an in tangent and an out tangent. Depending on the preferred effect, you can use the toolbar icons to switch the tangents to auto, zero, step, or linear. You can also manually drag the tangent handles.
By default, animation tracks are recorded with a smooth transition. You can use the buttons in the toolbar at the top of the Curve Editor to change how the curves behave on either side of the selected key. You can also drag spline keys to a different point in the timeline.
To display the Curve Editor
- In the UI Animation editor, choose View, Curve Editor or View, Both.
To zoom in or out
- Scroll the mouse wheel
To pan the view
- With the mouse in the Curve Editor, drag using the middle mouse button
To adjust a spline key
In the Node Pane, select a track. The curves for that track appear in the Curve Editor.
In the Curve Editor, select a spline key.
Do one or more of the following:
- Drag the spline key to a different point on the timeline.
- Use the toolbar buttons to select a preset: auto, zero, step, or linear.
You can select multiple spline keys to modify at once. Once selected, you can move them all together, set their in and out tangents, and so on.
To select multiple spline keys
- In the Curve Editor, drag a selection box over all the spline keys you want to select.
To edit multiple elements at once
In the Animation Editor’s node pane, select the track that contains the subtracks that you want to edit.
Drag a selection box over the spline keys that you want to select.
Drag spline keys to edit their position.
